![]()

![]()
You need to add Users to give them access to the application. You can provide general details about the Users and also assign Role Templates to them. The Role Templates define the menu and submenu access, and access to specific Instances, and so on.
To add new Users:

Figure: USER LIST page

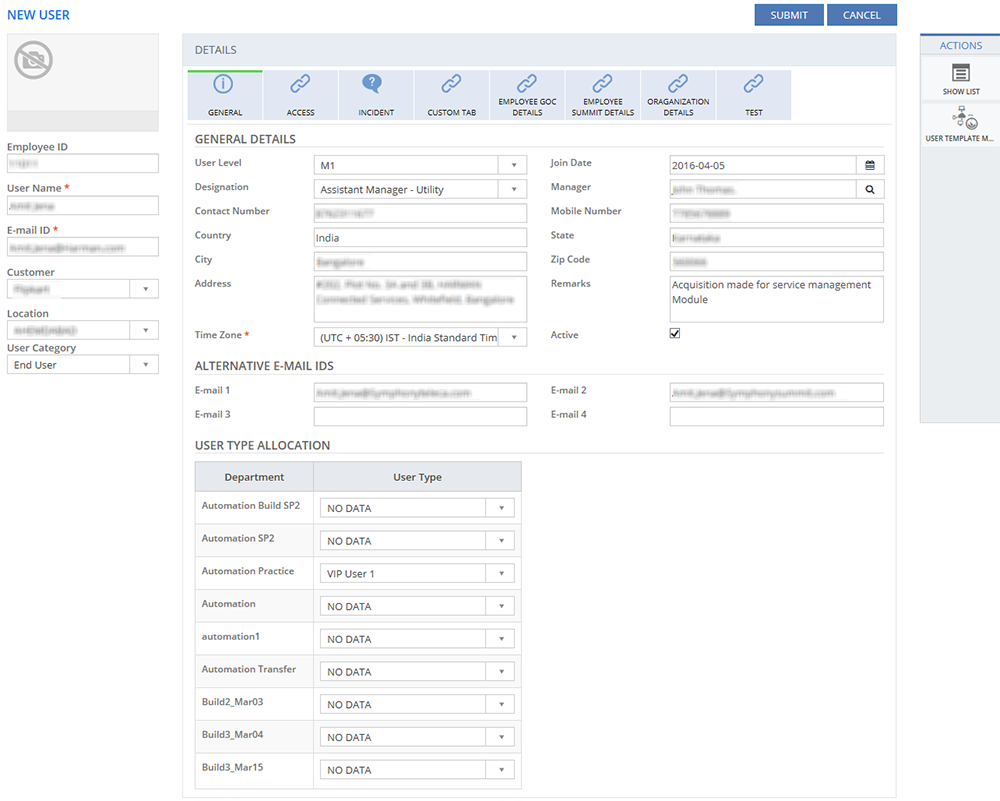
Figure: NEW USER page
| Field | Description |
| Employee ID | Type in the employee identification number of the User. |
| User Name | Type in the name of the User. |
| E-mail ID | Type in the e-mail address of the User. |
| Customer | Lists the configured Customers. Select the Customer name of the User. |
| Location | Lists the configured Locations. Select the Location name of the User. |
| User Category | Select the category of the User:
|
This section describes the fields on the USER ID page.
 GENERAL
Tab
 ACCESS Tab
 INCIDENT Tab
The Custom Tabs if defined for the Customer are also displayed in addition to the above tab. For information about configuring Custom Tabs, see Configuring Custom Tabs.
This section explains all the icons displayed on the ACTIONS panel of the NEW USER page.
SHOW LIST
Click SHOW LIST to display the LIST table showing all the Users configured in the SUMMIT application. For more information about viewing Users, see Viewing User List.

Figure: USER LIST page: List of Users
| Note: When the Customers are displayed under the LIST table, the ADD NEW action is displayed on the ACTIONS panel. Click ADD NEW to configure a new Customer. |
USER TEMPLATE MAPPING
Click
USER TEMPLATE MAPPING to view the Role
Templates that are mapped to the User whom you added.  See
Screen
  Shot.
Shot.
Filters
Click Filters to display all the Users configured in the SUMMIT application. On the FILTERS pop-up page, select the Customer and Location from the respective list. You can also search for a specific User by typing the name of the User in the User Name field. Click SUBMIT.
![]()
Figure: FILTERS pop-up page