![]()
![]()
![]()
![]()
You can configure Mailboxes to enable E-mail Parsing. You can configure both Exchange and Pop-3 servers for the Mailboxes for a Department. For more information about E-mail Parsing, see E-mail Parsing.
To configure a Mailbox:
 See
screen shot.
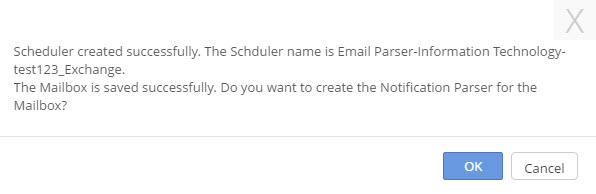
See
screen shot.
If you click OK, you are redirected to NOTIFICATION PARSER page. For more information about the NOTIFICATION PARSER page, see Configuring Notification Parser.
If you click Cancel, new Mailbox is configured.
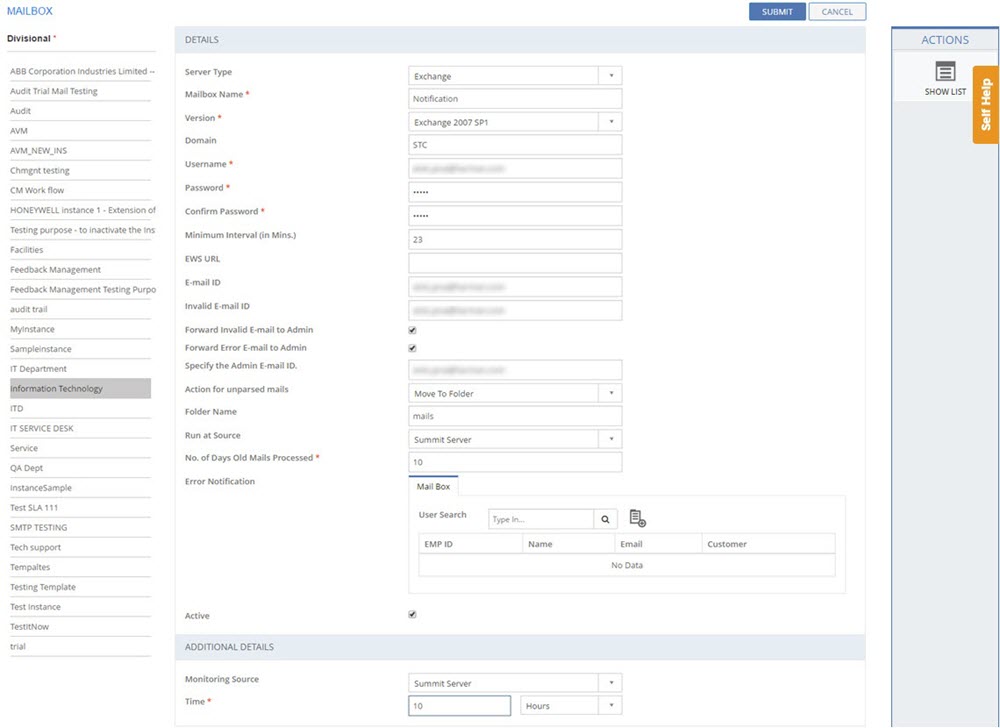
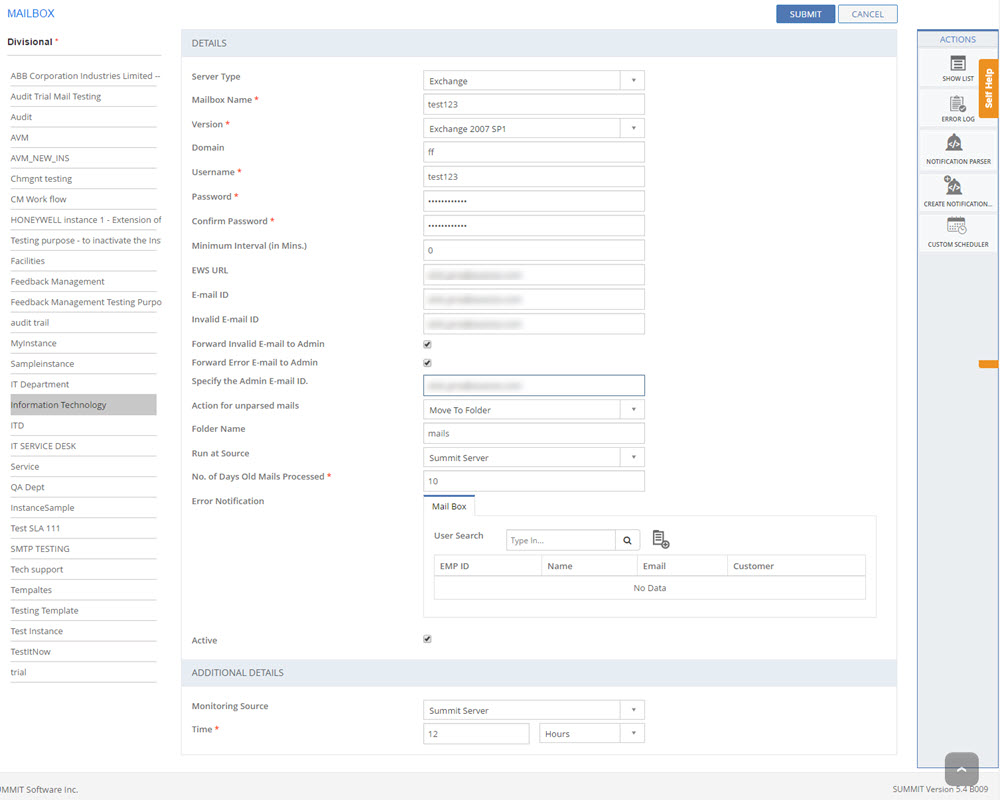
Figure: MAILBOX page
The following table describes the fields on the MAILBOX page:
| Field | Description |
| DETAILS | |
| Server Type | Select a server type from the list: Exchange or Pop-3. |
| Mailbox Name | Type in the name of the Mailbox. |
| Version | Select an operating system from the list: Exchange 2007 SP1 and Exchange 2010. |
| Domain | Type in the selected server’s domain name. |
| User Name | Type in the configured user name for the selected domain. |
| Password | Type in the password. |
| Confirm Password | Type in the same password again for confirmation. |
| EWS URL | Type in the Exchange Web Service (EWS) URL for the selected server type. |
| E-mail ID | Type in the e-mail ID of the user. Specifying of EWS URL or the e-mail ID is mandatory. |
Forward Invalid E-mail to Admin |
Select this check box for the application to forward the invalid e-mails to the Administrator. After forwarding the e-mail to the Administrator, the e-mail is deleted. |
| Forward Error E-mail to Admin | Select this check box for the application to forward the e-mails, which failed to parse. These failed e-mails are forwarded to the Administrator. After forwarding the e-mail to the Administrator, the e-mail is deleted. |
| Admin E-mail ID | Specify the Administrator e-mail id to receive the invalid and error e-mails. |
| Delete Unparsed E-mail | Select this check box to delete the e-mails, which failed to parse. |
| Unparsed Mail Action | Select the action to be performed on the unparsed e-mails from the list: Delete or Move to Different Folder. If Move to Different Folder option is selected, the Folder Path field is displayed. Specify the path for the folder where you want the unparsed e-mails to be moved in the Folder Path field. |
| Run at Source | Specify the source: SUMMIT Server or SUMMIT Proxy
|
| No. of Days Old Mails Processed | Specify the number of old days mails to be processed. |
| Error Notification | You can configure the users to notify about
any errors occurred while parsing e-mails for a mailbox configuration.
Search the user in the User
Search field and click
the |
| Active | Indicates the status of the Mailbox configuration.
|
| ADDITIONAL DETAILS | |
| Monitoring Source | Select a Monitoring Source from the list. |
| Time | Select time format from the list and specify the Time. |
This section explains all the icons on the ACTIONS panel of the MAILBOX page.
Filters
Click Filters to specify a particular filter criteria to display the configured Mailboxes. On clicking the Filters icon, the FILTERS pop up page is displayed. Select the Instance/Department and Server Type, and click SUBMIT.
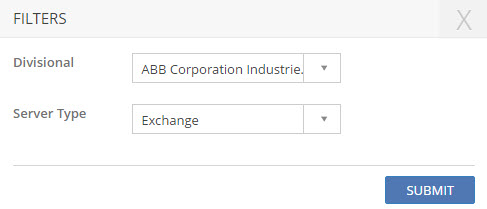
Figure: FILTERS pop-up page
SHOW LIST
Click SHOW LIST to display the LIST table showing all the configured Mailboxes as per the selected Server Type value for the selected Department.

Figure: MAILBOX page : List of Mailboxes
See
Screen Shot.
| Note: When the configured Mailboxes are displayed under the LIST table, the ADD NEW action is displayed under ACTIONS. Click ADD NEW to configure a new Mailbox. |
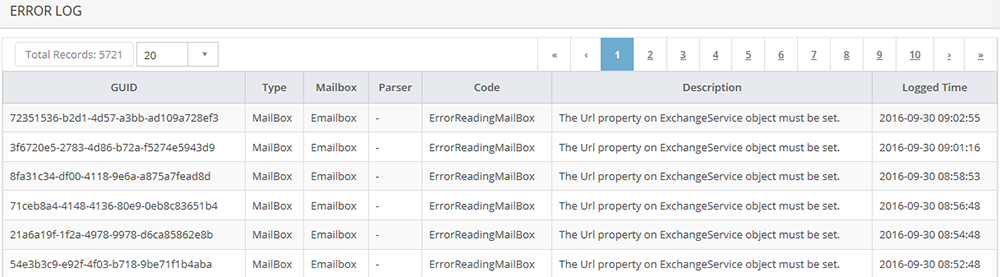
ERROR LOG
Click ERROR LOG
to view the error details. The ERROR LOG
pop-up page is displayed. See
screen shot.
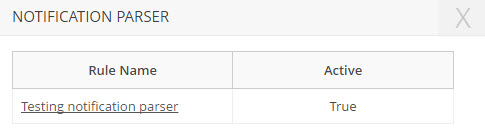
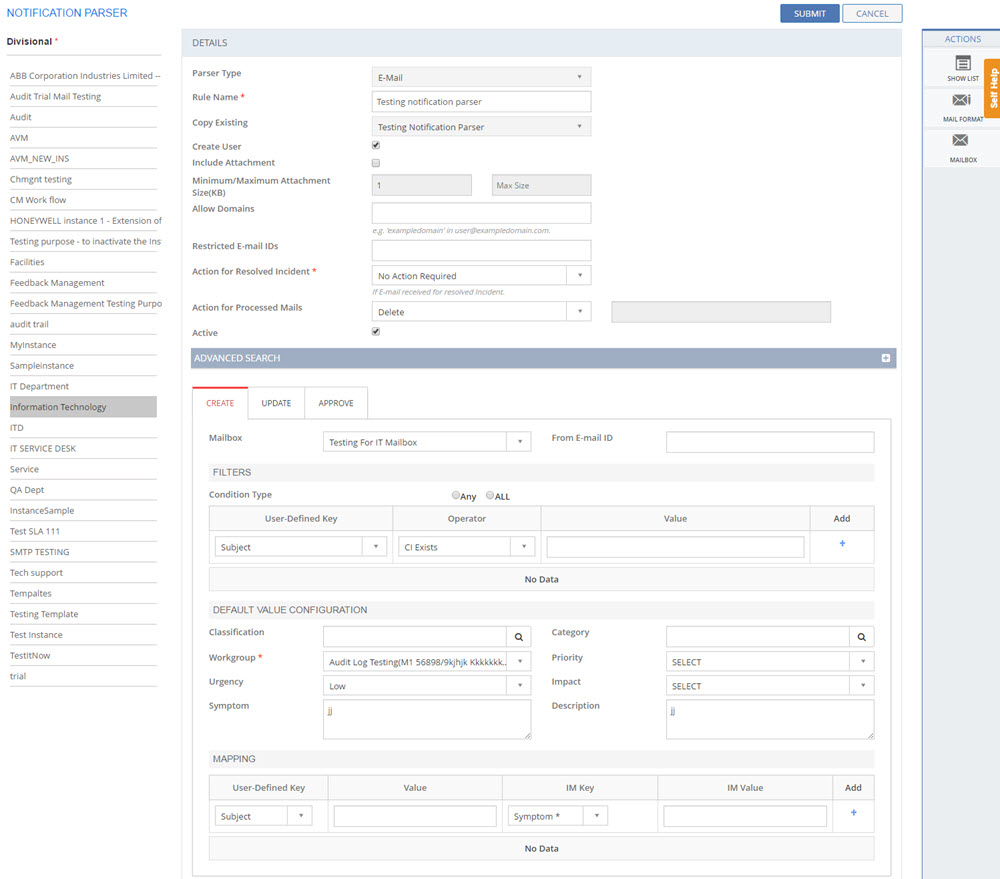
NOTIFICATION PARSER
Click NOTIFICATION PARSER to view Rule list.
NOTIFICATION PARSER
pop up page is displayed.
See screen shot.
Click Rule name to
configure NOTIFICATION PARSER. NOTIFICATION
PARSER configuration page
is displayed. See
screen shot. For
more information about the NOTIFICATION PARSER page,
see Configuring
Notification Parser.
CREATE NOTIFICATION PARSER
Click CREATE NOTIFICATION PARSER to create NEW NOTIFICATION PARSER. For more information about the NOTIFICATION PARSER page, see Configuring Notification Parser.
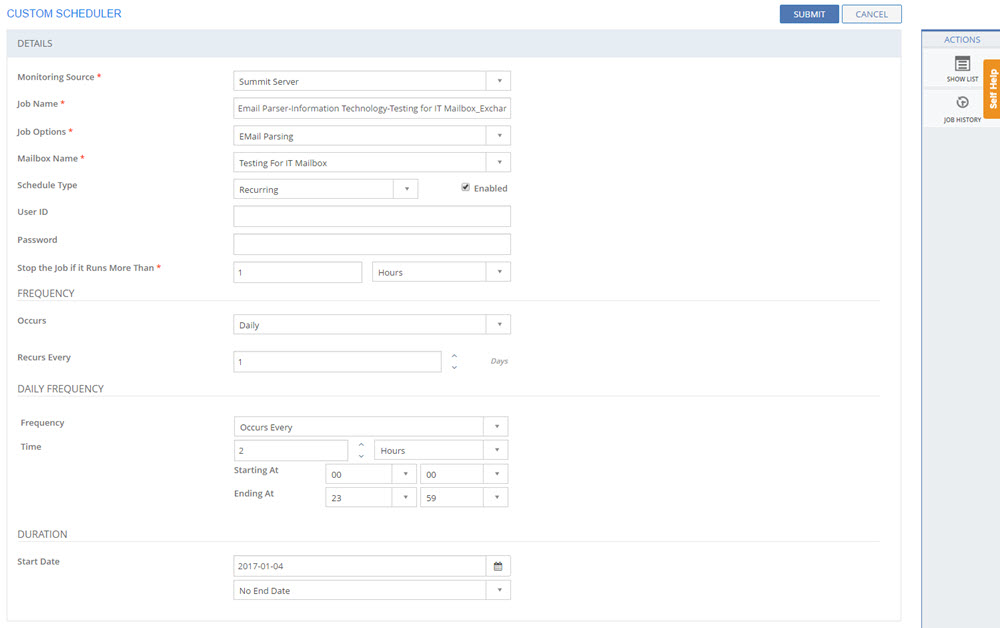
CUSTOM SCHEDULER
Click
CUSTOM SCHEDULER to configure
CUSTOM SCHEDULER for the Mail
Box. CUSTOM
SCHEDULER page is displayed.
See screen shot.
For more information about the CUSTOM
SCHEDULER page, see Configuring
Custom Scheduler.